


My next reader feature comes from Judy, who has been following the blog for about a year and a half now. Judy has sent me pictures and questions along the way, so I kinda feel like I’ve been a part of her makeover. Now that it is all finished, I’m excited to be able to share it with you, so here’s Judy to tell us all about her camper transformation… 😀
My family and I have been avid tent campers for many years. I’ve always admired the campers we see in different parks we visit. My husband grew up camping with his family in a pop up camper. He had many fun camping stories, so it was a no brainer for us to get one ourselves. As we started looking for pop up camper, lo and behold, we discovered a great blog online called The Pop Up Princess. Larissa’s blog totally got me excited about how awesome a pop up camper could really be!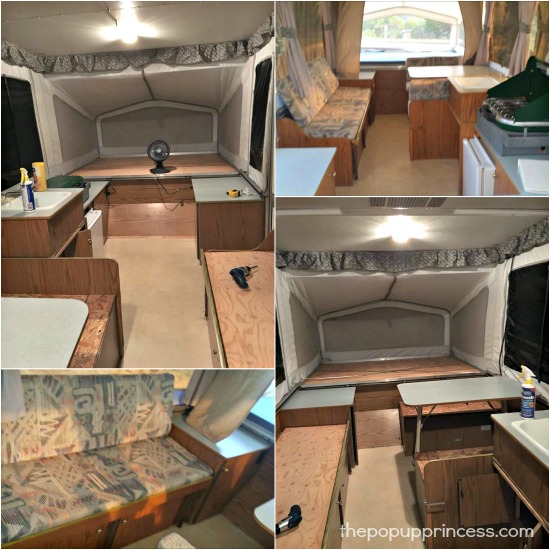
So after over a year and a half of searching, we finally found “the one” a few towns away from us. Everything about it was perfect. The color, the condition, the price–even the drive to Fredericksburg, Texas was beautiful. We came home with our 2002 Starcraft camper about a month ago. After several weeks of rain, we were finally able to get in to start the remodel. During that time, we were able to pick our color scheme and decide on floors.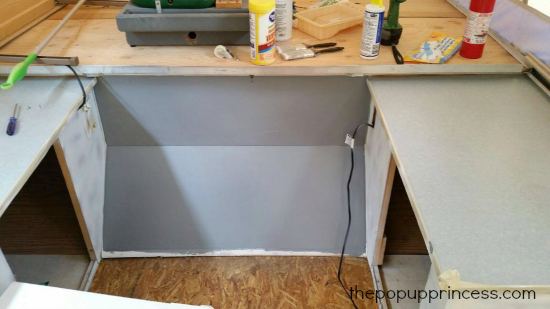
We purchased our paint from Lowe’s–Sherwin Williams Ovation. We painted the cabinets Aesthetic White and the walls Software, which is a gray color. They each got two coats of semi-gloss paint and one coat of spray on Kilz primer. We removed all cabinet faces and hardware and laid them outside. We reused the hinges, but spray painted them with a Rustoleum Metallic Bronze. We purchased our knobs at Hobby Lobby for $1.79 each.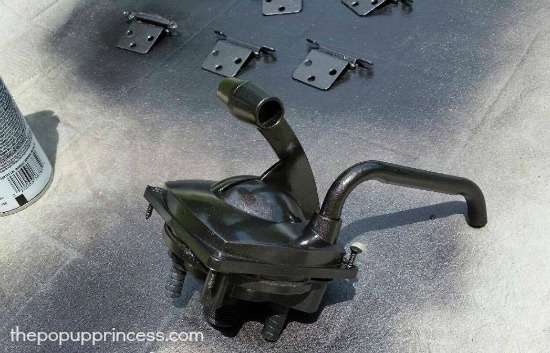
For our countertops, we used a method that we got from Holly’s makeover, right here on The Pop Up Princess. We applied two coats of the Rustoleum countertop paint in gray mist from Home Depot. Then we sprinkled with the tops with the Rustoleum color chips in the mocha color. Once everything was dry, we sealed it with three coats of Polycrylic.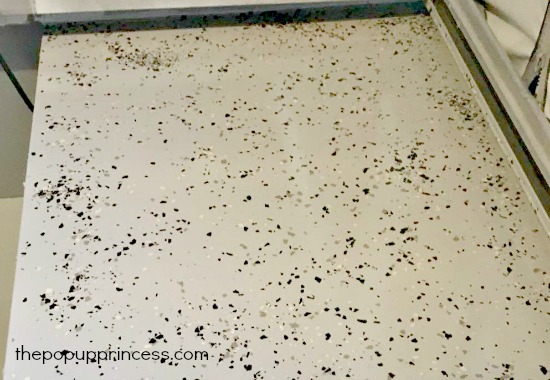
When it came to floors, we chose not to take the cabinets out. We pulled out all the old linoleum and rolled an all purpose peel-and-stick laminate primer directly on to the bare wood, as recommended by Home Depot. We went with gray slate peel-and-stick linoleum tiles, which only cost us .79 cents a square foot.
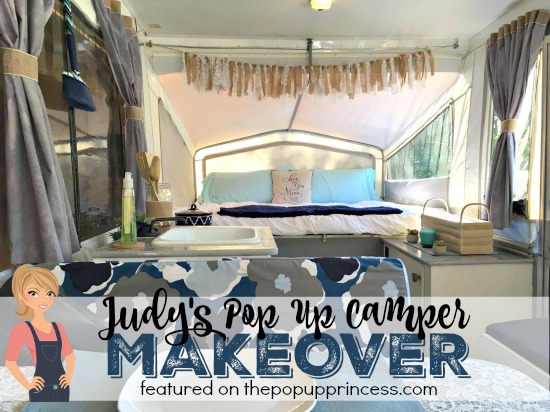
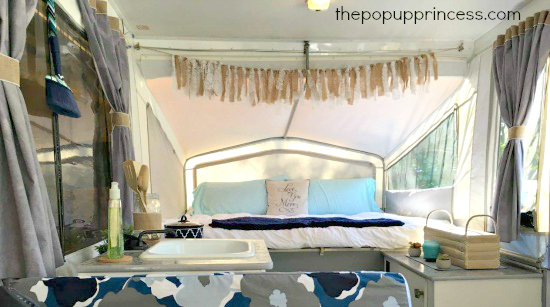
In the meantime, a friend’s grandma, who is a wonderful seamstress, was working on our cushion covers. We selected a floral print for the seat back and a solid for the bottom cushion. She made the covers to fit directly over the originals, which were still in great condition–just ugly. 😉 We did this because the original bottoms were waterproof vinyl, and we wanted to keep that layer of protection. We also wanted the extra support. She added zippers to the covers to make washing easy. The fabric we used was an indoor/outdoor fabric on sale for 6.99 a yard, plus I had a 20% off coupon from Joann. I found that if you download their app, you can instantly use a 20% off coupon.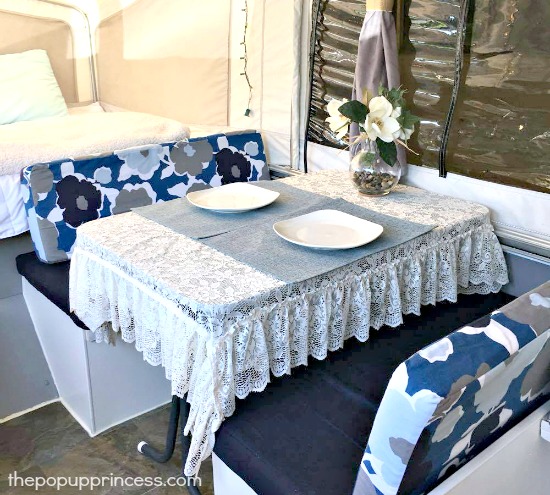
I do not sew, but luckily the original curtains were in good condition. We dyed them gray with RIT dye, and I hot glued burlap with peals at the top for a little border. I also used hot glue and Velcro to make tiebacks out of the burlap. We completely removed the bunkend curtains and the valance, and as of right now we’re happy with them not being there. We may change our minds at some point, but they will be easy enough to add down the road.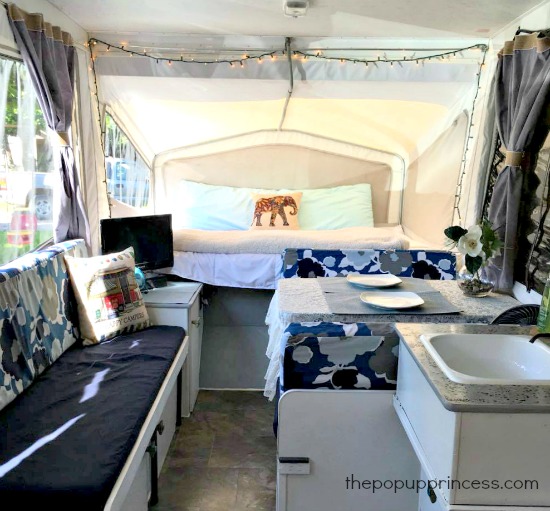
The table top was painted gray with the same countertop paint, however we didn’t use the plastic flakes on it. We simply sealed it with the Polycrylic. It turned out great, but I just love the touch that the lace table cloth gave the space. For the finishing touch, we also spray painted the table legs with a flat gray spray paint we got on sale at Lowe’s for $1.
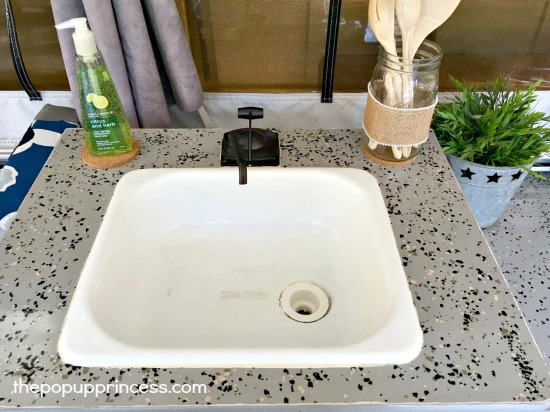
We really love the way the faucet turned out as well. We spray painted it along with the hinges, and it gives it a much more classy look.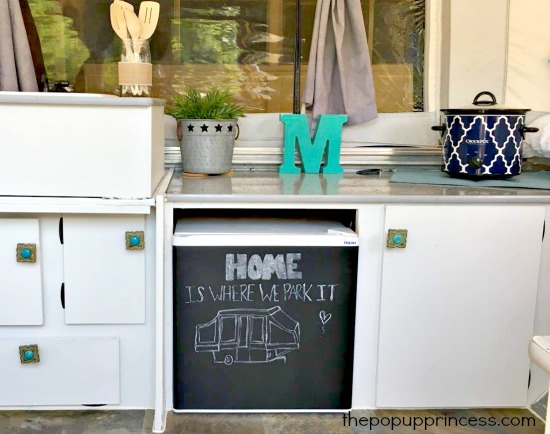
We also added chalkboard vinyl to our fridge, like Larissa did in her remodel. 🙂 All the accessories are from Goodwill, aside from the “M” and the crockpot. We used extra bedding and pillows that we already had to save a little money. Last, and my most favorite addition of all, was the anti fatigue mats. We used them on both beds and also on the table top bed.
To be perfectly honest, when I say “we”… I have to tell you… I have an amazing husband who did all of this to make me happy. I had the vision, and he made sure it all came out perfectly! 🙂 I did help and put in all the finishing touches, but he did all of the labor. Thank you to you all for your endless ideas and to Larissa for keeping up and sharing all of these wonderful makeovers. Happy Camping!
Wow! Nice job, Judy & hubby! I love all the little changes you made to your camper–and I love that you did it together even more. That is a tougher job than most realize. When we were working on our camper project, there were days when Mr. TypeTwoFun and I wanted kick each other off the island. In the end, though, it was the most rewarding project we’ve ever tackled–mainly because now we can use it to have grand adventures. And now Judy’s family is ready for some grand adventures of their own. 🙂
Happy Camping!

I love the idea of dying the curtains. I never thought of that! Nice job on your new camper!
Looks Terrific! I love your inventiveness, it just goes to show, just as Larissa emphasizes, you don’t need to spend a great deal of money to get a great result. I love checking out all of these great make-overs and getting ideas for my own. We’re still in the planning stage of our remodel. My husband has stripped our Fleetwood down to bare bones!
This is just beautiful. I really like the idea of not having bed end curtains, and I am definely stealing the idea of painting the sink hardware. I am just starting a remodel and it will be my daughters who will help. They are so excited about “our” project. Thanks for sharing Judy and Larissa.
I put the same tile and the same countertops in my PUP! 🙂
love how you fixed the camper I have one and the celling needs to be repaired it is peeling and the plastic is coming off . What kind of material can I use to fix this something that can stick to the celling because I can not nail anything to the roof or celling. Hope you can advice me on this. I will do the rest like you did hope it comes out as nice as yours. Thank you so much.
I recently decided to make over our pop up. To save money, I want to dye my existing curtains a darker shade of the existing color. Are there any pointers you can give? I am concerned how the color distribution will work out with the blackout backing. Please advise.
I have the same question! Judy – what exact color did you use of RIT? did it come out splotchy on either side? I was also looking at iDYE because I want a non-blueish grey color, and they have different ones based on material (polly, cotton, natural) but I don’t know what they are made out of. I want a solid color, not a tye-dye effect.
My ceiling is peel off how can I fix it?
Has anyone else used RIT to dye their curtains? Did you do them all at once or in batches? In a bucket or a washing machine? I am going to by the dye and I have to do it in the next couple of days because all the curtains are down and we are leaving Saturday morning.
I tried to hang other curtains and nothing is working out really well for me 🙁
Judy used RIT dye to dye hers. You can see how they turned out here.