


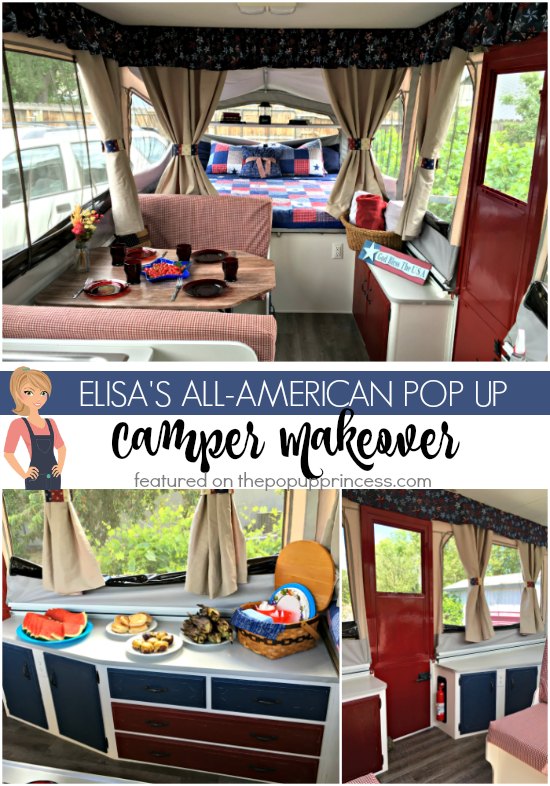
 Fourth of July weekend always calls to mind memories of camping with cousins, picnics, and fireworks for me. I’m sure many of you all have Independence Day camping traditions as well. That’s why I think that the theme of this next pop up camper makeover is pretty near perfect. Elisa and her family wanted their new pop up camper to have a summer cottage feel to it. Elisa’s favorite color is red, but in an effort to compromise with the rest of the family, she let them pick out fabrics and colors for the makeover as well. Her husband picked the blue, her older daughter picked the flooring, her younger daughter picked a country red check fabric, and Elisa came across a Fourth of July sign in her storage shed that tied it all together. An Americana theme materialized, and they couldn’t be happier.
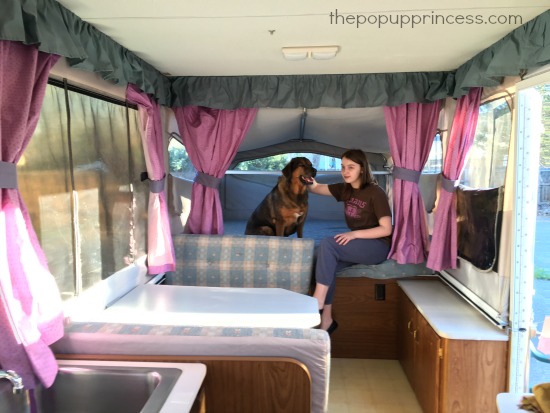
Elisa’s mother surprised her with an early birthday present this year–money to buy the family a camper. Elisa wasted no time searching for just the perfect pop up for her family. They came across this 1991 Starcraft Nova for $1500 and knew it was the one. Once they picked out their theme, they got straight to work removing all the fabric and cushions. Then they gave their new PUP a good cleaning.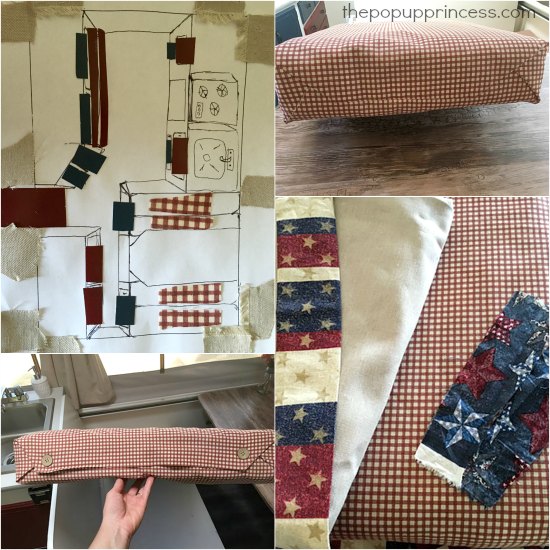 Elisa was pretty thorough, and the makeover became somewhat of a family affair. Her daughter made a diagram of the camper, and they started planning everything out. The cushions got covered with that fabulous country red check fabric that her younger daughter picked out. Elisa found a great tutorial for envelope style cushion slipcovers here, and she followed it pretty closely. She did add cute primitive wooden buttons to the ends for a little country flair.
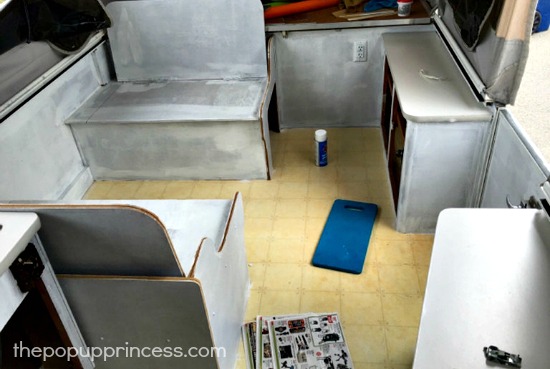 The cabinets got cleaned well and lightly sanded. Elisa removed all the cabinet doors and hardware to paint separately. Then the cabinet bases and doors got a coat of Zinsser 123 primer. The cabinet bases got a coat of creamy white paint, but the doors and drawers were painted red and blue. Elisa took some sandpaper and a wet rag to the doors to give them an antiqued look. The hinges, door pulls, and table legs were given a coat of Rustoleum hammered bronze spray paint.
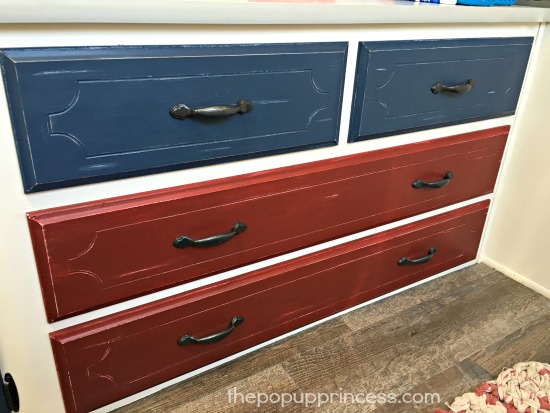 Elisa also gave the furnace grate a coat of blue spray paint, and the camper door got a fresh coat of bright red. It really makes it pop, doesn’t it? 🙂
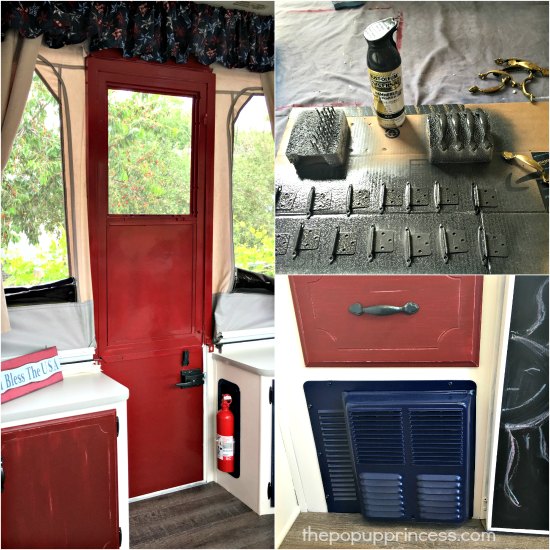
Elisa’s older daughter had picked out a pretty weathered gray adhesive-backed plank vinyl from Lowes to replace the yellowing sheet linoleum in the camper. Elisa and her husband washed the old linoleum well with a mixture of Dawn dish soap, vinegar, and water. Then they scuffed it up to provide a better surface for adhering the new planks. They recommended knee pads and lots of patience for this project. 😉 I think it turned out amazingly well, though, don’t you? Well worth the effort.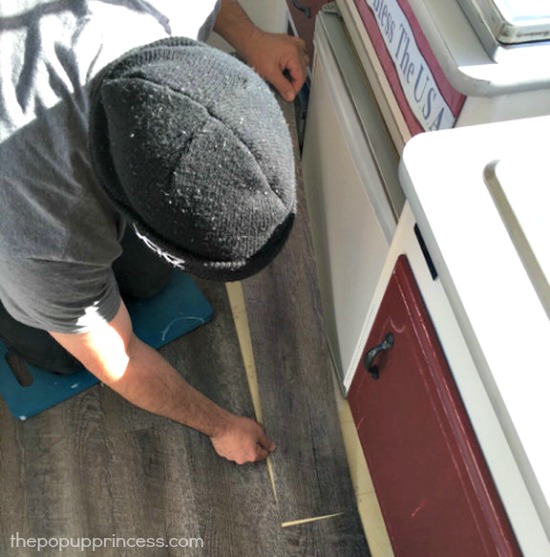 For the curtains, Elisa found a fabric store that was going out of business in her area. She was lucky enough to score a nice, heavy-weight linen colored fabric for $.99/yard. It was originally $21/yard, so she was pretty happy with the find. She sewed the new fabric right over the existing curtains so she could reuse the hanging hardware. The valance proved a little more difficult.
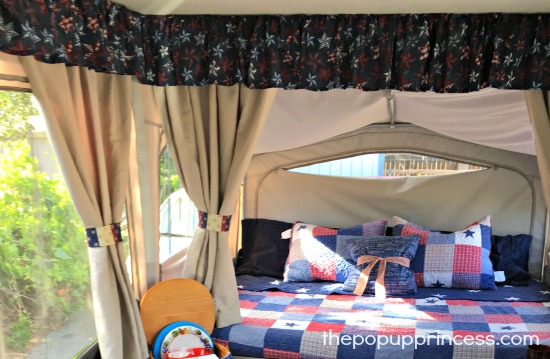 The original valance had been stapled to the ceiling, and Elisa didn’t want to go that route with the new one. She used a system of eye screws, bungee cords, and curtain rings to hang her new valance. If you’d like to see more of just how she did it, you can check out her blog post here.
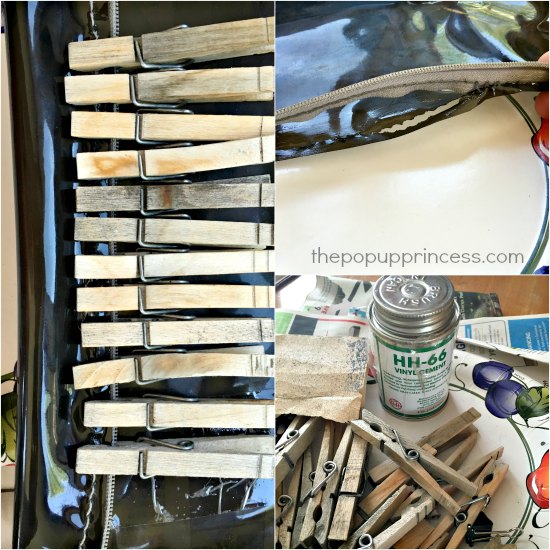
The vinyl windows in her canvas tenting had pulled away from the zipper in places, and she was looking for an economical way to repair that. Elisa purchased some HH-66 Vinyl Cement and used it to glue the zipper back to the vinyl. She cleaned the vinyl well and lightly sanded it per the HH-66 instructions. Then she applied the cement to the vinyl and reattached the zipper, using clothespins to hold it tight while it was drying. It worked like a dream. Elisa told me that she has pulled on the seam, zipped and unzipped the windows, and rolled the windows up. It has held fast. Nice idea, Elisa!
Elisa and her family would like to eventually rebuild the table but were looking for an economical solution in the interim. They covered the dinette table in a wood grain Contact paper to cover the old laminate top. She also covered the fridge and stove cabinet in chalkboard vinyl. I just love how it completes the look–and it’s so fun for doodling or keeping track of camping menus.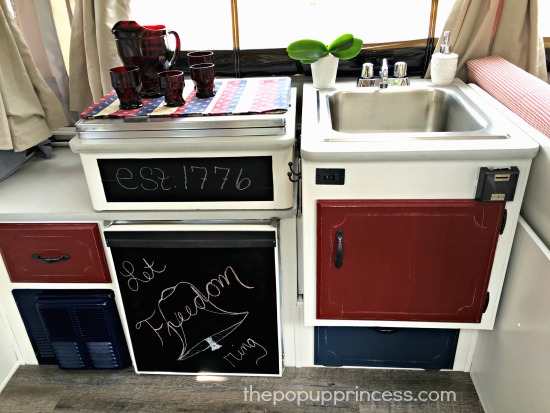 Didn’t Elisa and her family do a wonderful job bringing that country cottage feel to their new little pop up camper? It is so unique, and I’m sure they’ll have wonderful memories of working on their camper together as a family. Let’s take a look at that before and after shot one more time… yeah, you know I’m a sucker for a good remodel. 😉
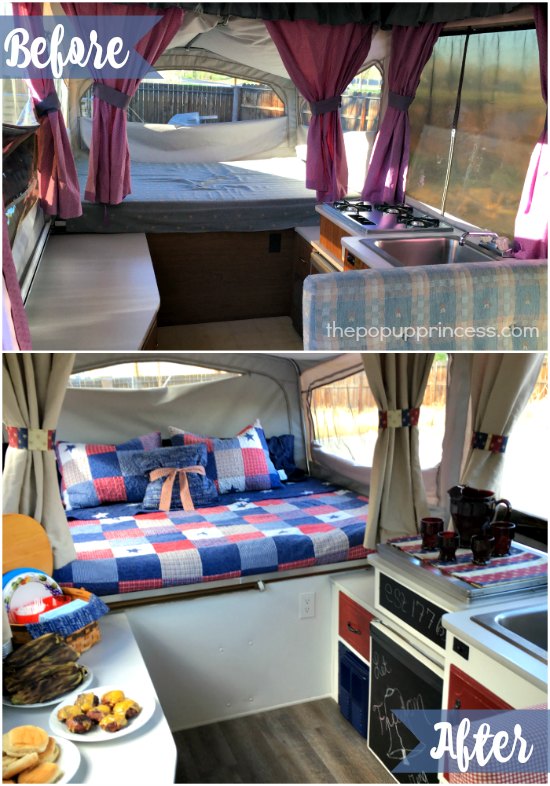 If you’d like to see more on Elisa’s pop up camper remodel, you can visit her blog All American PUP. She’s got lots more pictures and details there, so if you’re hungry for more of the nitty gritty, head on over. Great job, Elisa! Thank you so much for sharing. 😀
Disclaimer: This post contains Amazon affiliate links. The Pop Up Princess is a participant in the Amazon Services LLC Associates Program, an affiliate advertising program designed to provide a means for sites to earn advertising fees by advertising and linking to Amazon.com. This means that if you choose to purchase an item from a link in this post, The Pop Up Princess earns a small advertising fee to help pay for future projects and posts… so thank you! 🙂
Happy Camping!

one part of my roof has cracked separated ABS to the foam would ABS plumbing cement work to restore then proceed with your Mek
I’m not really sure, Kelly. I don’t know how that would work with one of the surfaces being foam and the other ABS. I don’t have a lot of experience with ABS cement. I know that for delamination, many people recommend Gorilla Glue and a syringe. Then you add a heavy weight to keep the surfaces in contact until the glue cures. You might want to ask on PopUpPortal.com is anyone has used ABS plumbing cement instead. It’s a great place to go for answers to uncommon PUP questions. 🙂
Wow…this is by far my favorite makeover! I love the red/white/blue theme, and all the little details really make the difference. I love the red door…never thought to paint that! Was there any special procedure for painting that compared to the cabinets? Also can you tell us more about the bedding?
Thank you so much Michelle!
We are really happy with how she turned out!
Our door is my favorite part!! In response to all the questions we’ve been getting about painting our camper door, we did a blog post on it. You can see it here.
http://nvschulmans5.wix.com/allamericanpup#!Painting-your-Camper-Door/cgla/577f465d0cf2226bda9afaa3
We searched high and low for Americana bedding that wasn’t $150+. We found that bedding on Amazon on sale for $35!!! 😊
I bought this bedding yesterday for my pup from Target.com name Caroline for $35. I am also doing mine in red, white and blue.
I love what you do on featuring pop up camper makeovers. I love the the americana look on this one.
Larissa, Elisa!!! OMG, I have a 1995 StarCraft Stardust 1021. I got it in Feb 2013 and every year, some “little” thing seems to fall apart. This year, the ZIPPER! I cannot tell you how happy I am to have found a solution. I had nightmares of having to replace my canvas, which would cost more than I paid for the camper!
This site has saved me! I now can install a “potty”, add storage shelves, paint, floor, everything. Who needs a new camper??
BUT, I have one question: My camper had no table and the “seating” for the dinette area is across the camper, next to the “master” bed. How does one add a table there and still be able to get into bed?
Also, I have a pump sink which I still have not figured out and a “dry ice” refrigerator…hum…
OK, I guess that was 3 questions!!
Glampinshell