


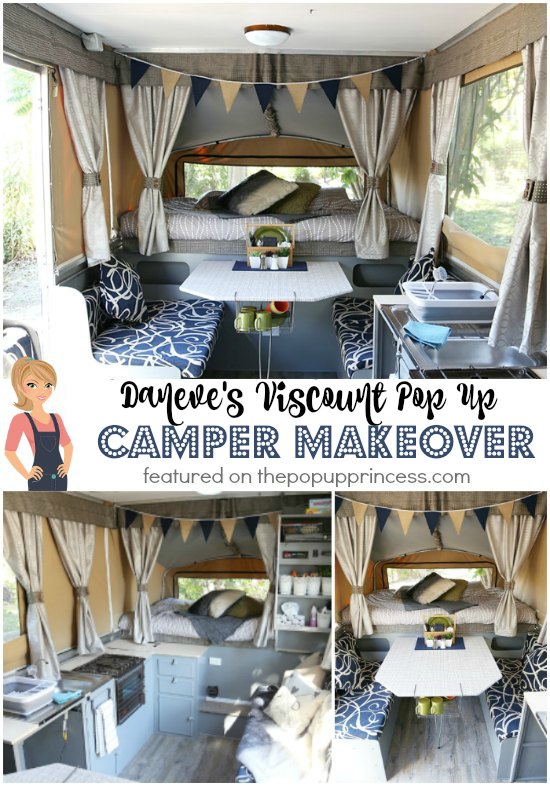
This next reader feature is especially awesome, because not only is it another Australian pop up remodel, but the owner, Daneve, also used many of the tutorials found on the blog to mod her camper! I love seeing that the camper tips and tricks we’ve employed work for others–especially others halfway around the world. Camping really is a universal language! 😉
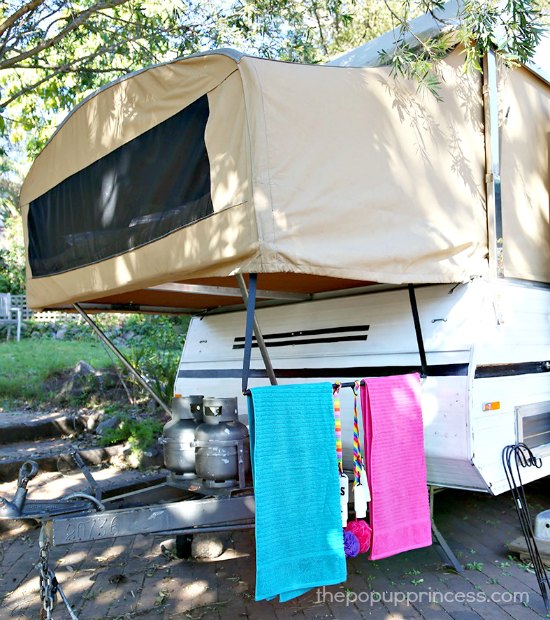
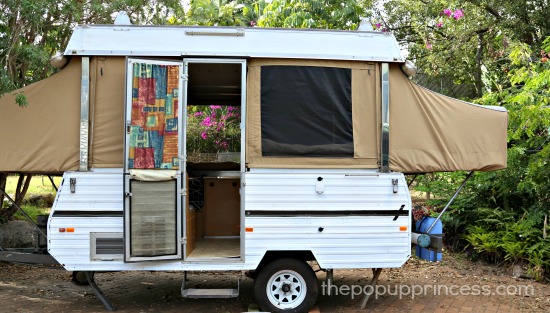 This is Daneve’s “new” camper. Daneve and her family of four initially thought of buying a new camper, but a brand new Jayco camper would have cost her around $30000 ($23K USD) in Australia. They simply couldn’t justify that kind of price, so they started looking online for a used camper.
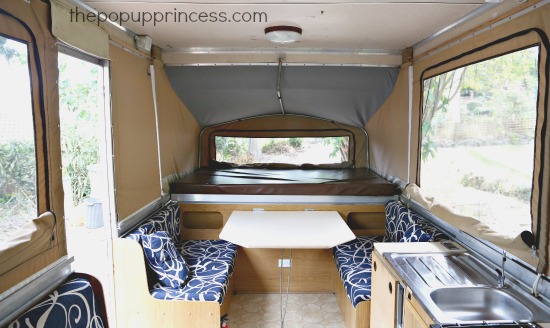
It didn’t take them long to find one–a 1985 Viscount–on eBay. They inspected it, made an offer, and were pop up camper owners before they knew it! Once she had her own camper, Daneve did some research online, and came across the “Jayco Camper Reno Queens Australia” group on Facebook and this blog. Both gave her so much inspiration, and she knew it was time to give her PUP a little makeover.
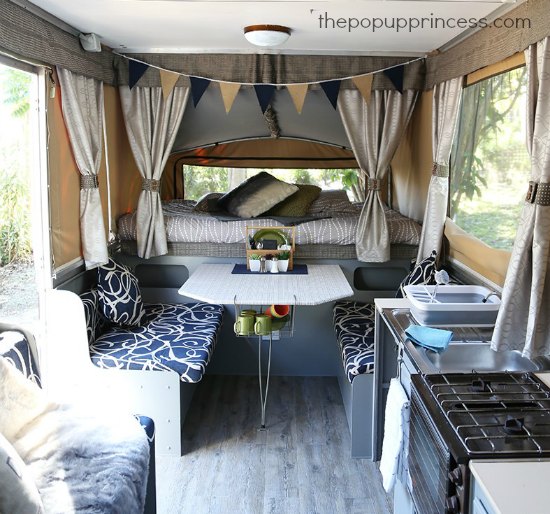
When planning out what they wanted to achieve with their camper, Daneve and her family had to consider their small budget. The cushion covers were still in great condition, so they decided to use them as the inspiration for the color scheme. Everything else was worked around those awesome navy cushions. Why can’t we have gorgeous camper cushion covers like that in the States? I love those! 😀
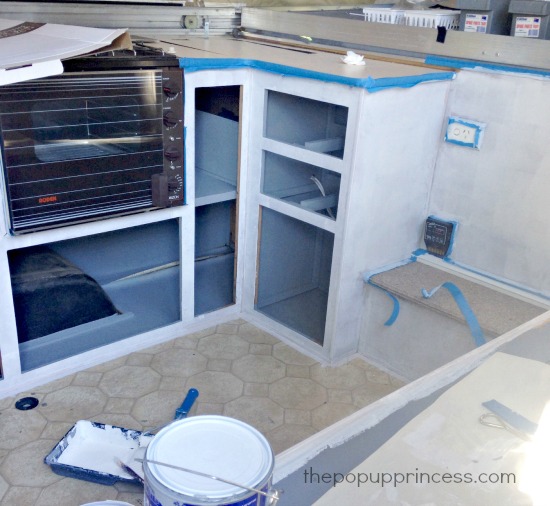
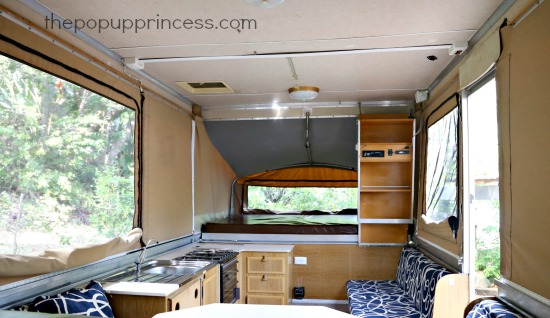
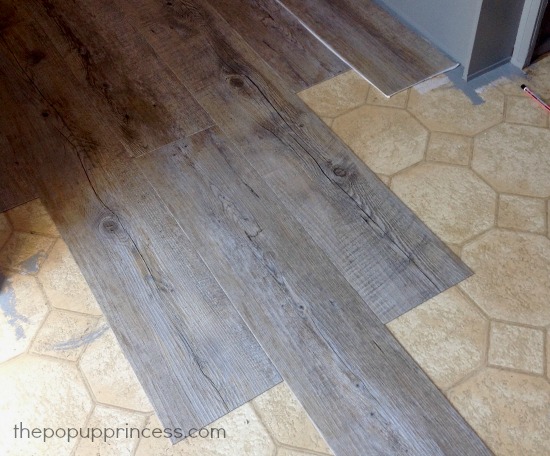
The first thing Daneve did was prime and paint the walls, ceiling, and cabinets using paint purchased at Bunnings, Australia. She replaced two hinges (purchased at Caravans Plus) and one cabinet latch, which she was able to find on eBay. Daneve cleaned the floors well and installed a brand new plank vinyl flooring from Bunnings. I love the old barn wood look. It compliments her wall color perfectly.
 Daneve cleaned the floors well and installed a brand new plank vinyl flooring from Bunnings. I love the old barn wood look. It compliments her wall color perfectly.
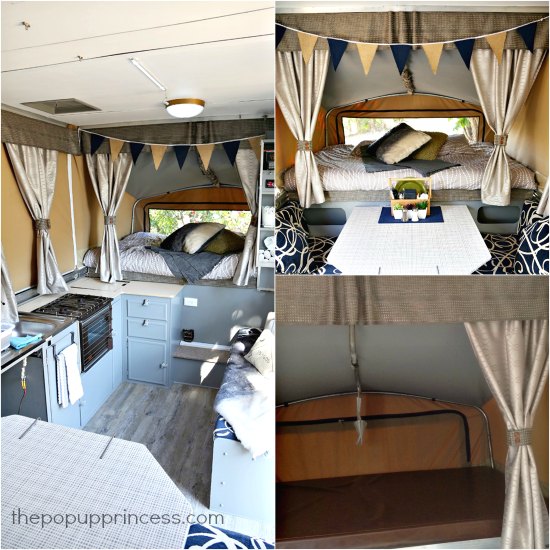
She also made new curtains, tie backs and valances using materials she purchased at Spotlight and Kmart (Australia). For her curtains, she bought black out drapes from Kmart and was able to make two curtain panels from each one.
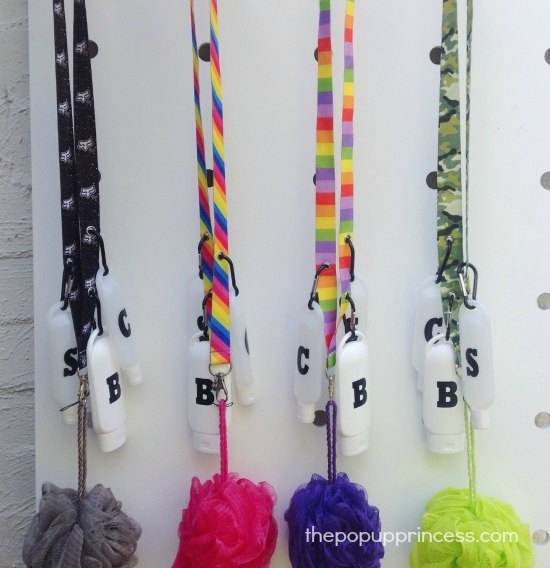
Daneve used the shower lanyard tutorial from the blog (found here) to make shower lanyards for each family member. She made them a little differently, though, and added eyelets for her carabiner clips instead of d-rings. She also added towel racks under each bunkend (tutorial here) for drying towels and lanyards.
Daneve tells me she still has several modifications on the agenda for later down the road. She wants to replace her table and countertops, change out her sink, paint the exterior of the camper, and add some shelving. For the time being, though, she is really happy with how things have turned out, and she and her family have already taken their new camper on a couple of trips. If you want to read more about Daneve’s adventures, you can visit her blog, Endless Aussie Adventures.Wow! Look at that gorgeous camper! I’m jealous of all the amazing storage space Daneve has… and look at that kitchen! Amazing job, Daneve! Thank you so much for sharing it with all of us! 😀
 Wow! Look at that gorgeous camper! I’m jealous of all the amazing storage space Daneve has… and look at that kitchen! Amazing job, Daneve! Thank you so much for sharing it with all of us! 😀
Happy Camping!

Fantastic! I love the table setting & storage basket underneath
This is a true inspiration. The colors are gorgeous!!
love the redo. What an awesome job to draw, inspiration from.
Hi I am currently re-modelling a pop-up camper and wondered how the stick on vinyl planks are going for Daneve? I purchased some from bunnings also but when I checked the packaging it said not to use them in caravans because they dont stand up to the temperature changes very well. I ultimately ended up using sheet vinyl but preferred the look of the vinyl planks. anyway just curious.
thanks
Does anyone have a suggestion to clean old mildew stains on canvas.
Check out this post from Campfire Travelers, Deb.
MiracleMist-Instant-Mold-and-Mildew-Cleaner-for-RV-s-and-Boats.